Introduction to Homemade Crunch Bars
A Sweet Beginning
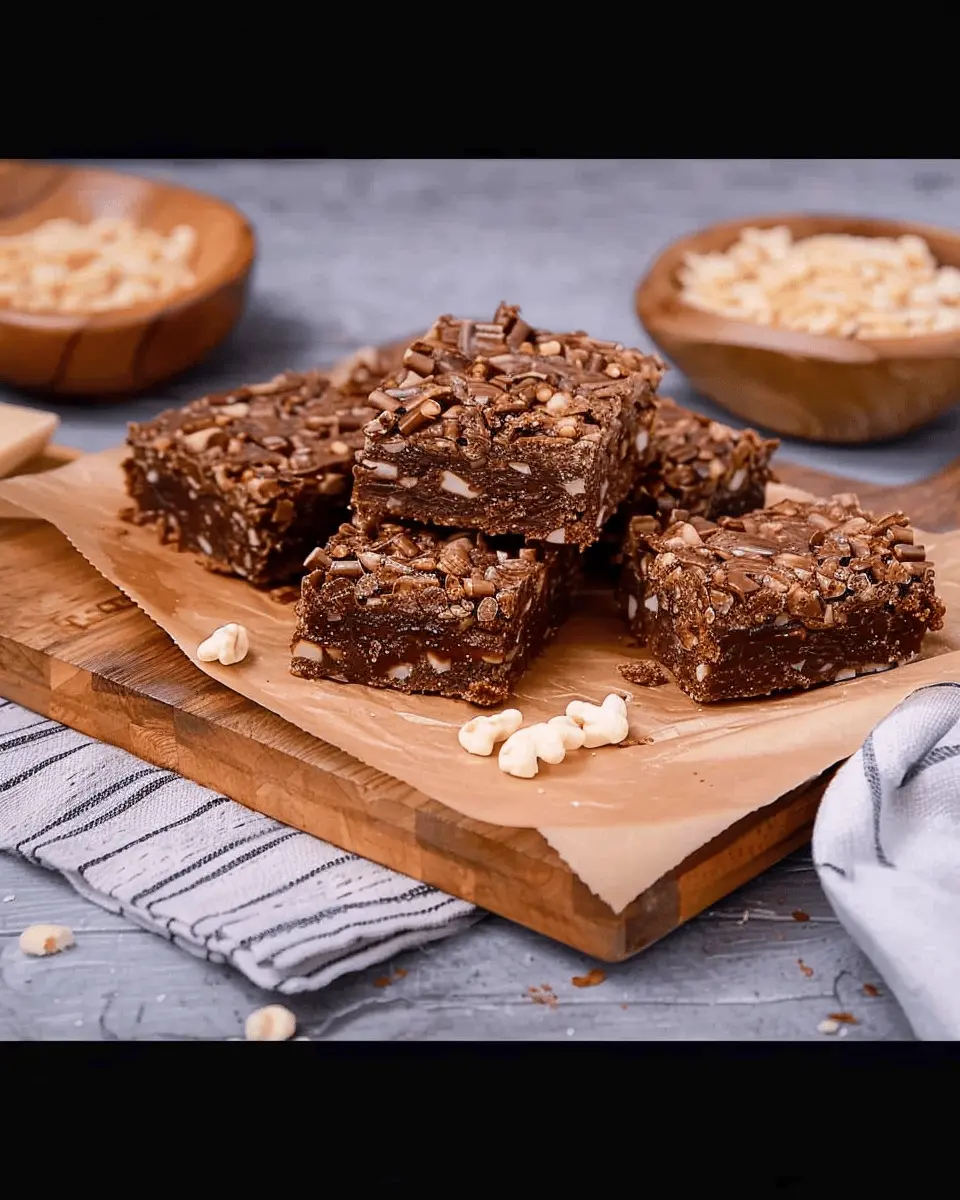
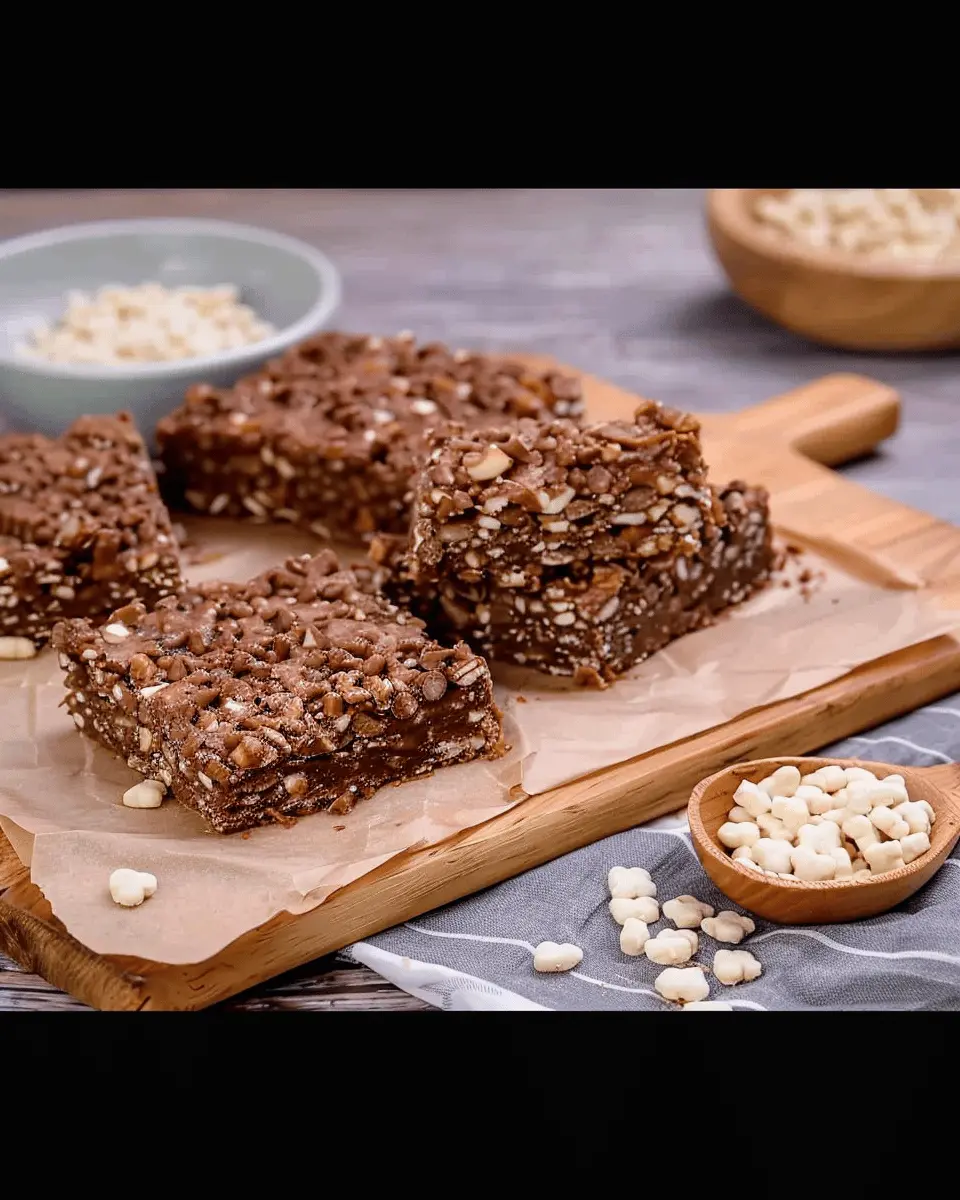
I still remember the first batch of homemade crunch bars I ever made. It was a rainy Saturday afternoon when I decided to take on the challenge. Armed with nothing but a few basic ingredients and a generous amount of determination, I whisked together chocolate, crispy rice cereal, and a hint of peanut butter. As I poured the mixture into the pan, I could hardly contain my excitement. After letting them cool in the fridge, the moment of truth arrived. As I took my first bite, the delightful crunch and chocolatey goodness transported me straight back to childhood. It was a small kitchen win that sparked a newfound passion for DIY snacks.
Elevate Your Snack Game
For young professionals constantly navigating busy schedules, homemade crunch bars are a total game changer. Think about it: how often do we find ourselves reaching for a sugary snack or overpriced granola bar during those mid-afternoon slumps? Homemade snacks offer a healthier, more satisfying alternative.
Why are they such a hit? Here’s the scoop:
-
Cost-Effective: Making snacks at home is often less expensive than pre-packaged options. A simple online search can show you how much you save by making your crunch bars rather than buying them (see Consumer Reports on snack pricing).
-
Customizable Ingredients: You get to control what goes in! Prefer Turkey Bacon over marshmallows? Or maybe you want to add some dried fruits? You can make your bars exactly how you like them.
-
Boost Your Mood: The act of creating something from scratch can be extremely rewarding. Plus, enjoying a homemade snack gives you that cozy feeling, reminiscent of afternoons spent baking with family.
Next time you find yourself in a snack rut, consider whipping up a batch of homemade crunch bars. They not only satisfy your cravings but also bring a touch of joy into your daily routine. Let’s dive into the recipe so you can start creating your own delicious memories!
Ingredients for Homemade Crunch Bars
Essential ingredients for the base
Creating delicious homemade crunch bars starts with a few key ingredients that form a solid foundation. Here’s what you’ll need:
- Chocolate: Use quality dark or milk chocolate for that rich flavor. You’ll need about 1 cup, chopped or in chips.
- Crispy rice cereal: This gives the bars their signature crunch. About 3 cups will do.
- Nut butter: Peanut or almond butter works wonders! Aim for around ½ cup to bind everything together.
- Sweetener: A splash of honey, maple syrup, or agave (about ¼ cup) adds the perfect touch of sweetness.
With these essentials, you’ll create a fantastic base that screams delectable crunch!
Optional add-ins for a personalized touch
The fun doesn’t stop there! Consider adding your favorite ingredients to tailor your homemade crunch bars. Here are some suggestions:
- Nuts or seeds: Almonds, walnuts, or even pumpkin seeds can add texture. Try tossing in about ½ cup.
- Dried fruit: Go with cranberries, raisins, or apricots for a touch of sweetness. About ⅓ cup is perfect.
- Protein powder: For a health boost, add a scoop of your favorite protein. This can help you power through your day!
- Spices: A pinch of cinnamon or vanilla extract can elevate the flavors beautifully.
Personalizing your bars not only enhances the taste but also makes them uniquely yours! What combinations are you thinking about? Explore various options for a creative twist! For more ideas on snacks, check out this great resource on healthy treats.
Remember, experimenting is part of the fun, so let your taste buds be your guide!
Step-by-step Preparation of Homemade Crunch Bars
Making your own homemade crunch bars is not only a rewarding experience but also allows you to create a delicious snack that’s tailored to your tastes. Let’s dive into the step-by-step process of whipping up these delightful treats!
Gather Your Ingredients
Before diving into the kitchen, it’s essential to gather all your ingredients. This makes the cooking process smoother and more enjoyable. Here’s what you’ll need:
- 1 cup of rolled oats
- 1 cup of crispy brown rice cereal
- ½ cup of nut butter (like almond or peanut butter)
- ½ cup of honey or maple syrup
- 1 teaspoon of vanilla extract
- ½ cup of chocolate chips (dark or milk chocolate, based on preference)
- Optional add-ins: shredded coconut, dried fruits, or Turkey Bacon pieces for a sweet-and-savory twist.
Having everything at your fingertips means fewer interruptions, allowing you to enjoy the cooking process even more. If you’re curious about different nut butter options, check out Healthline for a thorough overview.
Prepare the Base Mixture
Begin by creating the base for your homemade crunch bars. In a medium-sized saucepan, combine your nut butter and honey (or maple syrup). Heat this mixture over low to medium heat, stirring constantly until it’s smooth and well combined. This should take about 3-5 minutes.
Once the base is ready, remove it from the heat and stir in the vanilla extract. This simple addition packs a punch of flavor that will lift your crunch bars from good to great!
Incorporate the Add-Ins
Next, it’s time to bring everything together. In a large mixing bowl, combine the rolled oats and crispy brown rice cereal. These two ingredients will form the crunchy heart of your bars.
Pour the warm nut butter mixture over the dry ingredients and stir until everything is evenly coated. If you want to add some excitement to your bars, now’s the time to incorporate any optional ingredients like chocolate chips, shredded coconut, or even small pieces of Turkey Bacon. Combining sweet and savory elements can truly elevate your snack experience.
Did you know that adding protein-rich Turkey Bacon might enhance the nutritional profile of your crunch bars? It’s an interesting twist that many enjoy!
Press the Mixture into a Pan
With your mixture ready, it’s time to transfer it into a pan. Line an 8×8-inch baking dish with parchment paper for easy removal later. Gently scoop your mixture into the dish, using a spatula to spread it evenly. Then, you want to firmly press down the mixture to compact it. This step is crucial for ensuring your bars hold their shape once cut.
If you find that the mixture is sticking to your spatula, lightly greasing it with a bit of coconut oil can help.
Chill and Cut Your Crunch Bars
After pressing the mixture into the pan, it’s time to let it chill. Cover the dish and pop it into the refrigerator for at least an hour. This allows the bars to firm up nicely, making them easier to cut.
Once chilled, lift the mixture out of the pan using the parchment paper. Place it on a cutting board and cut it into your desired bar size. Feel free to get creative – they can be smaller for snacks or larger for meal prep.
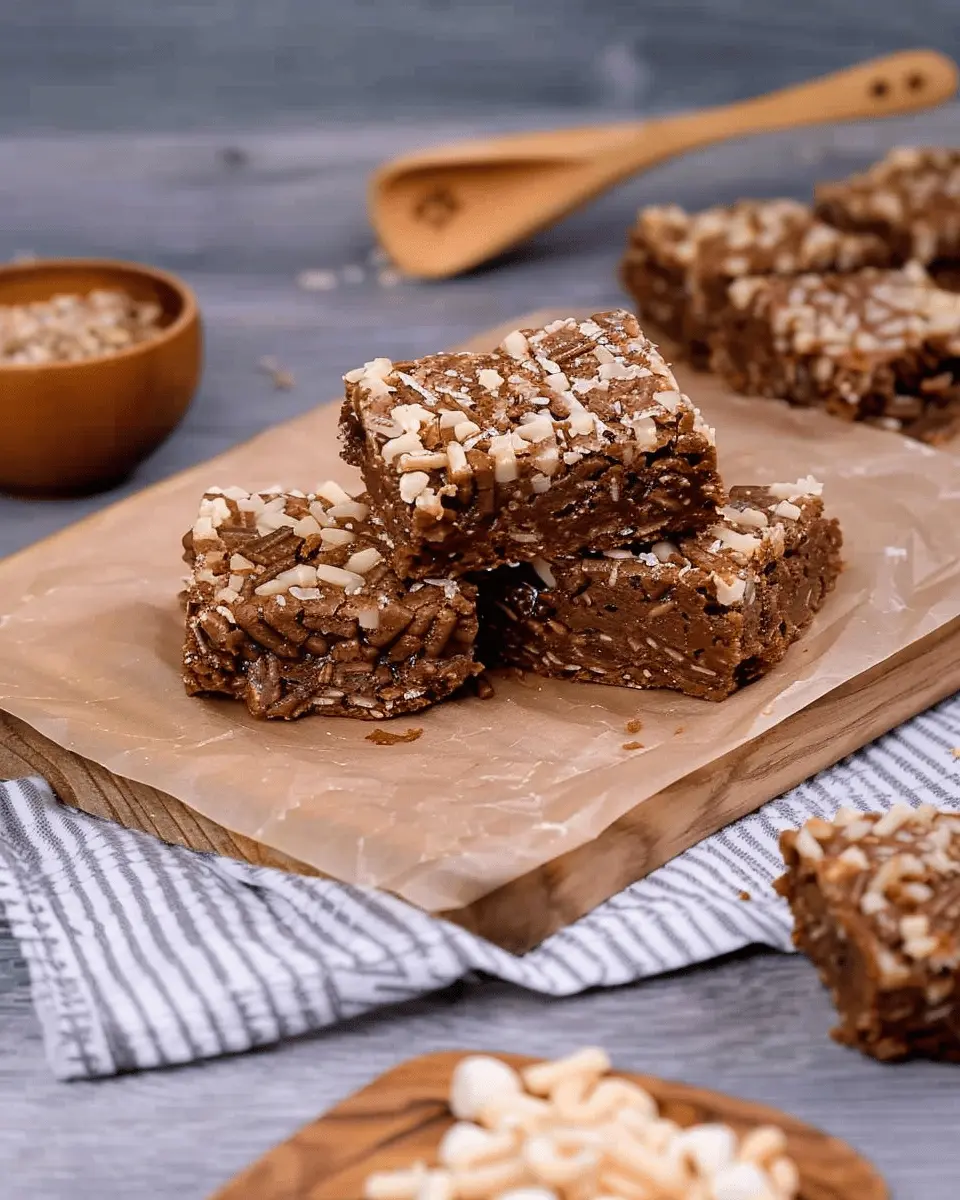
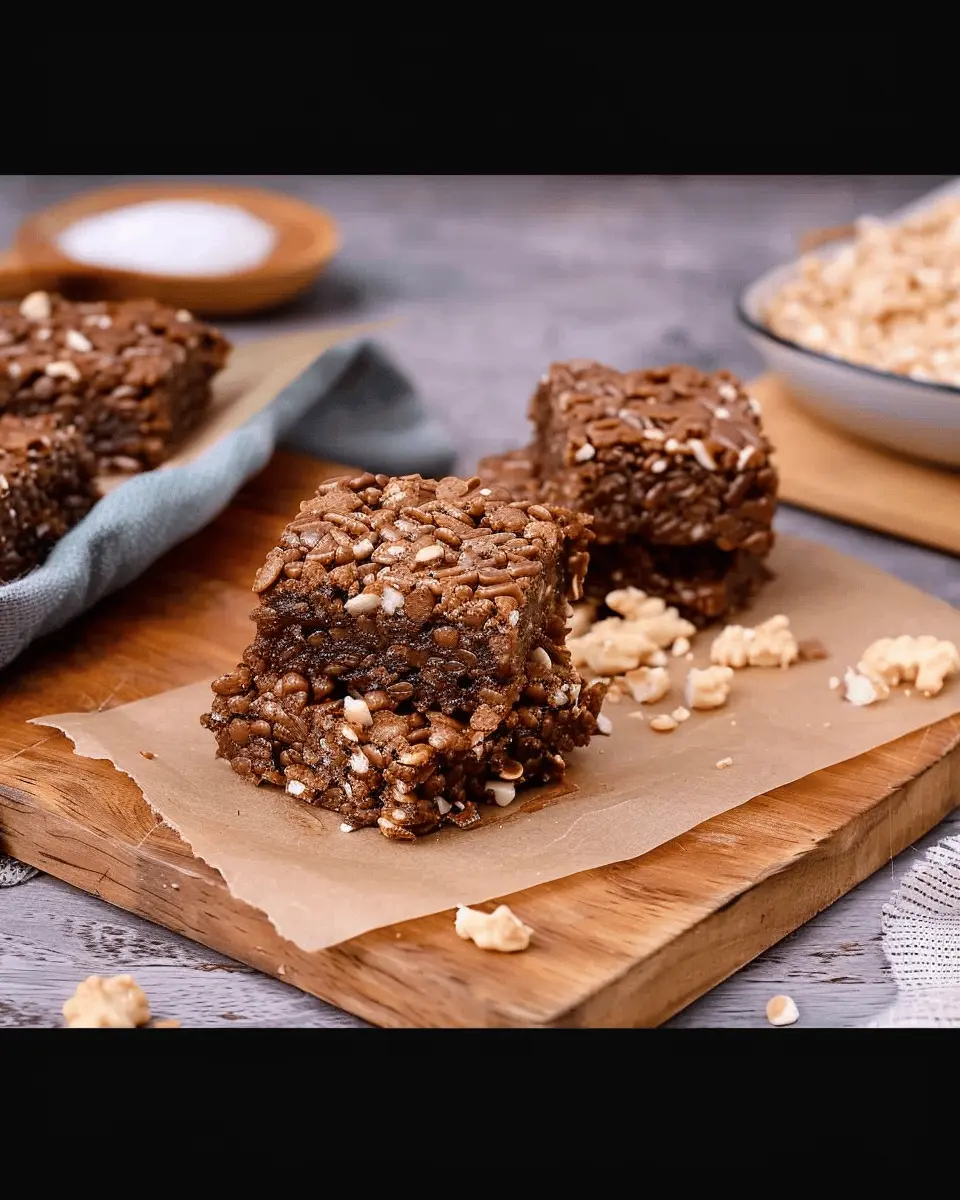
And there you have it! Your homemade crunch bars are ready to be enjoyed as a nutritious treat anytime. These homemade bars can last in an airtight container in the fridge for up to a week, but we doubt they’ll stick around that long. With a little inspiration, you can make this recipe your own. Try different flavors or add-ins and share your favorites with friends. Who wouldn’t want to enjoy delicious homemade snacks that are packed with wholesome ingredients? Happy snacking!
Variations on Homemade Crunch Bars
Making homemade crunch bars offers a world of possibilities! Let’s explore three delicious variations that will excite your taste buds and elevate your snack game.
Nutty Crunch Bars
If you crave a protein boost, nutty crunch bars are the way to go! Simply mix your favorite nuts—think almonds, cashews, or pecans—with crispy rice cereal and a sweet binding agent like honey or maple syrup. The combination creates a delightful texture and nutty flavor that’s hard to beat. Pro tip: roast the nuts lightly to intensify their flavor before mixing them in!
Chocolate-Drizzled Crunch Bars
For those with a sweet tooth, try chocolate-drizzled crunch bars. After layering your base of homemade crunch bars, melt some dark chocolate (or milk chocolate, if that’s more your jam) and drizzle it generously over the top. Not only does this elevate the look of your bars, but it also adds a rich depth of flavor. To make it even more exciting, consider adding toppings like crushed pretzels or flaky sea salt for that sweet and salty balance.
Fruit and Seed Crunch Bars
Looking to incorporate more nutrients? Fruit and seed crunch bars are your best bet. Add dried fruits like cranberries, apricots, or raisins along with seeds such as chia or sunflower seeds. This combination adds natural sweetness while boosting fiber and healthy fats. If you’re curious about the health benefits of seeds, you might want to check out this detailed guide from Healthline.
These variations not only satisfy different cravings but also make homemade crunch bars a versatile go-to snack for your busy lifestyle. Enjoy experimenting!
Cooking Tips and Notes for Homemade Crunch Bars
Common pitfalls and how to avoid them
When making homemade crunch bars, there are a few common missteps to watch out for. One of the biggest challenges is getting the chocolate coating just right. If you heat it too quickly, it can burn or seize up. Instead, opt for a gentle melt using a double boiler or microwave in short bursts.
Another pitfall is not allowing the bars to set long enough—patience is key! If you cut them too early, they may crumble. A good tip is to let them chill in the fridge for at least an hour.
Essential tools that make preparation easier
Having the right tools can make your homemade crunch bars a breeze to prepare:
- Silicone molds: Perfect for easy removal and pretty shapes.
- Double boiler: Essential for melting chocolate without burning.
- Offset spatula: Great for spreading toppings evenly.
For a deeper dive into kitchen essentials, check out Cook’s Illustrated here for additional insights on must-have tools. With these tips, you’re ready to create your perfect batch of homemade crunch bars!
Serving Suggestions for Homemade Crunch Bars
Perfect pairings for a snack attack
When you’re ready for a snack attack, consider enjoying your homemade crunch bars with complementary treats. Here are some fantastic pairings:
- Nut butter: A smear of almond or peanut butter enhances the flavor and adds protein for an energizing boost.
- Fresh fruit: Pairing with sliced apples or bananas creates a refreshing balance, perfect for a midday pick-me-up.
- Greek yogurt: For something more indulgent, dipping your crunch bars into creamy Greek yogurt adds a delightful tang and enriches your snack experience.
Craving even more inspiration? Check out this article on healthy snack combos for tips.
Ideas for homemade gifts using crunch bars
Looking for a thoughtful gift that showcases your culinary skills? Consider packaging homemade crunch bars in a decorative tin or cute box. Tie it with a ribbon and include a handwritten note. Perfect for:
- Housewarming: Share your favorite treats with new neighbors.
- Holiday gifts: Customize flavors or add festive toppings for a memorable touch.
- Care packages: Ideal for friends or family who need a boost during busy times.
These simple gestures can brighten someone’s day. For great gift-wrapping ideas, refer to this DIY guide.
Now you’re ready to whip up homemade crunch bars and impress everyone with your creativity and thoughtfulness! Happy snacking!
Time Breakdown for Homemade Crunch Bars
Preparation time
The first step to whipping up your delicious homemade crunch bars is preparation, which typically takes about 15–20 minutes. Gather your ingredients, like crispy rice cereal, chocolate, and peanut butter, and get ready to mix!
Chilling time
Once everything is combined, you’ll need to allow your bars to chill in the refrigerator. This crucial step takes about 1–2 hours. Trust me, this patience pays off when you unveil those perfectly set bars!
Total time
All in all, you’re looking at a total time of around 1 hour and 30 minutes to 2 hours and 20 minutes. In the grand scheme of things, just think about how easy and satisfying it will be to enjoy these homemade crunch bars with friends or at home!
For more tips on making the perfect snacks, check out this guide on kitchen hacks for all the shortcuts you’ll need!
Nutritional Facts for Homemade Crunch Bars
Calories and Macronutrients
When making homemade crunch bars, it’s crucial to know what you’re putting in your body. Each bar typically contains around 150-200 calories, depending on your recipe variations. You can expect a balance of macronutrients:
- Protein: 3-6 grams
- Carbohydrates: 15-25 grams
- Fat: 7-10 grams
By customizing your ingredients, like adding nuts or seeds, you can tweak these numbers to better fit your nutritional goals.
Health Benefits of Key Ingredients
The delight of homemade crunch bars stems from their wholesome components. Ingredients like oats provide fiber, which aids digestion and keeps you feeling fuller longer. Dark chocolate, rich in antioxidants, supports heart health while adding that irresistible crunch. Nuts, packed with healthy fats and protein, enhance flavor and offer satiety—perfect for a midday pick-me-up.
For a deeper dive into nutrition, check out resources from the Nutrition Journal or the American Heart Association. These sites offer great insights into the benefits of incorporating wholesome ingredients into your diet.
In making your homemade treats, you not only satisfy cravings but also nourish your body!
FAQs about Homemade Crunch Bars
Can I customize the ingredients?
Absolutely! One of the fantastic things about homemade crunch bars is that you can tailor them to your taste. Feel free to experiment with:
- Different types of chocolate (dark, milk, or white)
- Alternative sweeteners like honey or agave
- Nut butters such as almond or sunflower seed butter
- Add-ins like dried fruits, seeds, or even crushed nuts for extra crunch
Your creativity is the only limit! If you’re looking for more ideas on variations, consider checking out resources on baking substitutions.
How long do homemade crunch bars last?
Usually, homemade crunch bars can last about one week when stored properly. If you want to keep them fresh for a little longer, freezing is an option. Many recipes suggest that they can be frozen for up to three months without losing flavor or texture.
What’s the best way to store them?
For optimal freshness, stack your homemade crunch bars in an airtight container. Here are some handy tips:
- Layer with Parchment: Use parchment paper between layers to prevent sticking.
- Cool Completely: Make sure your bars are fully cooled before storing to prevent moisture buildup.
- Room Temperature vs. Refrigeration: While room temperature works fine for short periods, refrigerating your bars can extend their shelf life. Just be aware that refrigeration might change the texture slightly.
Storing them well ensures you always have a crunchy treat on hand! For additional tips on food preservation, check out sources like FoodSafety.gov.
Conclusion on Homemade Crunch Bars
Why You Should Try Making Your Own Crunch Bars Today
Creating homemade crunch bars is a delightful experience that allows you to control the ingredients, ensuring you’re enjoying a snack that’s both healthier and tastier than store-bought varieties. Think about the joy of customizing flavors and textures to suit your taste! Plus, they’re incredibly simple to whip up. If you’re looking for a fun way to impress friends or a quick treat for yourself, these bars are perfect.
Encouragement to Experiment in the Kitchen
Don’t be afraid to get creative! Use different nuts, swap chocolate for dark chocolate, or add your favorite seeds. The kitchen is your playground—feel free to explore combinations that excite you. By making homemade crunch bars, you’ll gain confidence and ignite a passion for cooking. So, grab your utensils and start experimenting! Who knows? You might just discover a new favorite recipe. For more inspiration, check out The Kitchn or Serious Eats for tips and tricks on enhancing your culinary skills. Happy snacking!
PrintHomemade Crunch Bars: The Best Indulgent Treat for Everyone
Delicious homemade crunch bars that everyone will love.
- Prep Time: 15 minutes
- Cook Time: 10 minutes
- Total Time: 25 minutes
- Yield: 12 bars 1x
- Category: Desserts
- Method: No-Bake
- Cuisine: American
- Diet: Vegetarian
Ingredients
- 1 cup rice cereal
- 1 cup chocolate chips
- 1/2 cup peanut butter
- 1/4 cup honey
- 1/2 teaspoon vanilla extract
Instructions
- In a saucepan, combine peanut butter, honey, and vanilla extract over low heat.
- Once melted, remove from heat and stir in the chocolate chips until smooth.
- Add rice cereal and mix until well coated.
- Press the mixture into a lined baking pan.
- Refrigerate for at least 1 hour until set, then cut into bars.
Notes
- For extra crunch, add nuts or seeds.
- Store in an airtight container for up to a week.
Nutrition
- Serving Size: 1 bar
- Calories: 150
- Sugar: 10g
- Sodium: 50mg
- Fat: 8g
- Saturated Fat: 3g
- Unsaturated Fat: 4g
- Trans Fat: 0g
- Carbohydrates: 15g
- Fiber: 1g
- Protein: 3g
- Cholesterol: 0mg
Keywords: Homemade Crunch Bars, Treats, Desserts