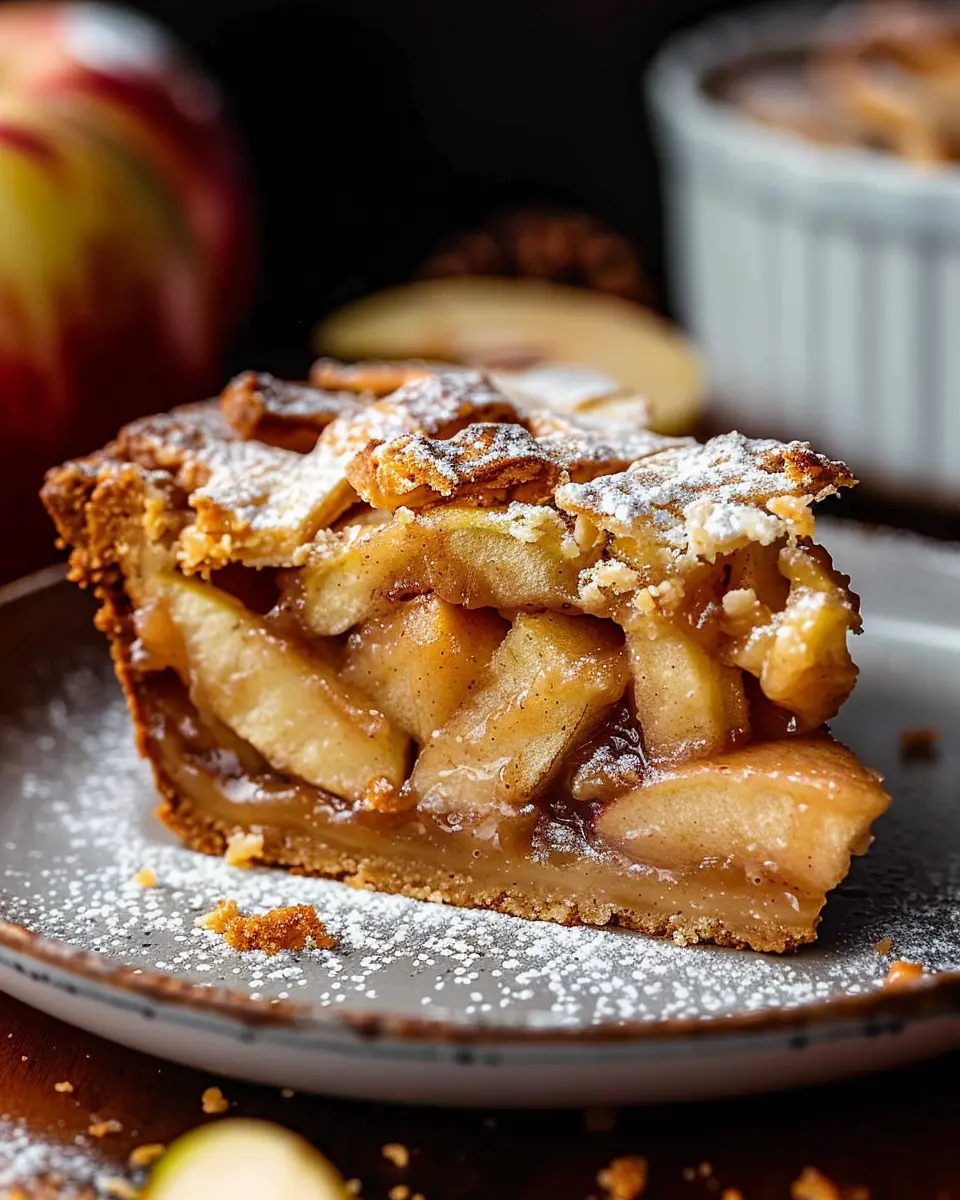
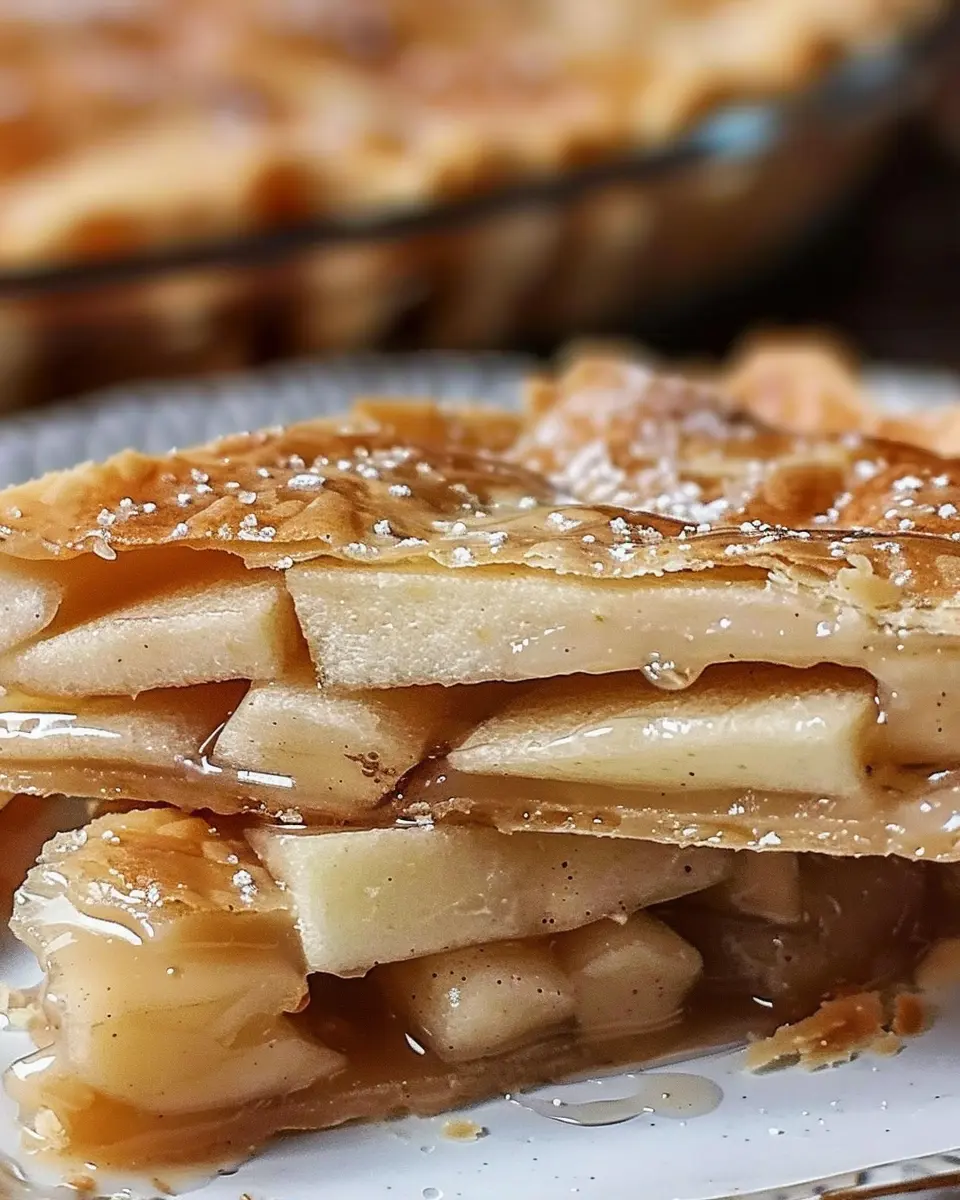
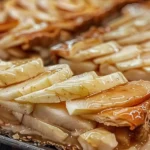
Introduction to Chicago-Style Bakery Apple Slices
When you think of apple desserts, what comes to mind? For many, it’s the warm, comforting scent wafting through the kitchen on a crisp autumn day. This lovely experience embodies the nostalgia of homemade Chicago-style bakery apple slices, a delightful treat that transports many back to their childhood. Traditionally found in cozy bakeries across the Midwest, these slices are more than just dessert—they’re a piece of home. Imagine the first bite: a flaky crust, a burst of perfectly spiced apples, and that hint of sugary goodness. It’s no wonder they hold a special place in our hearts!
But why reach for these delectable slices from your local bakery when you can whip them up right in your own kitchen? Let’s break down the advantages of homemade over store-bought.
-
Freshness: When you make your apple slices at home, you have the freedom to use the freshest ingredients. Combine locally-sourced apples with your favorite spices for that custom flavor everyone loves. The crispness of freshly baked pie is hard to match!
-
Customization: An exciting part of baking is putting your unique spin on a recipe. Want a touch more cinnamon? Or perhaps some caramel drizzle on top? The choice is yours! This kind of personalization makes each batch distinctly yours.
-
Health Considerations: Many store-bought desserts are packed with preservatives and refined sugars. Opting for homemade allows you to control what goes into your food. For example, substituting regular sugar with natural sweeteners can enhance both the flavor and nutrition of your Chicago-style bakery apple slices.
-
Budget-Friendly: Baking at home can save you money in the long run. Ingredients often cost less than their bakery counterparts, meaning you can satisfy your sweet tooth without breaking the bank.
So, whether it’s to enjoy with a hot cup of coffee during a quiet Sunday morning or to impress your friends at the next gathering, making Chicago-style bakery apple slices at home is both rewarding and fun. Not sure where to start? Don’t worry; we’ve got a fantastic recipe coming up that will have you baking like a pro in no time!
Ingredients for Chicago-Style Bakery Apple Slices
Creating delicious Chicago-style bakery apple slices begins with the right ingredients. Let’s break down what you’ll need for a delightful experience that will transport you straight to those cozy bakeries in the Windy City.
Essential Ingredients for the Crust
For the crust, you’ll want that perfect flaky texture. Gather these staples:
- 2 cups all-purpose flour: A must for structure.
- 1 teaspoon salt: Enhances flavor.
- 1/2 cup unsalted butter: Chilled and cubed for that ultimate flakiness.
- 1/4 cup sugar: A hint of sweetness.
- 6 to 8 tablespoons cold water: Just enough to bind.
Ingredients for the Sweet Apple Filling
The heart of your Chicago-style bakery apple slices is the filling. You’ll savor every piece with these ingredients:
- 4 medium apples (Granny Smith or Honeycrisp): Tart and sweet combine beautifully.
- 3/4 cup brown sugar: Deep, rich sweetness.
- 1 teaspoon cinnamon: For that warm spice.
- 1 tablespoon lemon juice: Brightens up the filling.
- 1 tablespoon cornstarch: Thickens the mixture.
The Perfect Glaze
Finish off your apple slices with a delightful glaze that adds that extra touch:
- 1 cup powdered sugar: Sweet and silky.
- 2 tablespoons milk: Adjust for desired consistency.
- 1 teaspoon vanilla extract: Adds depth and warmth.
Now that you have your ingredients lined up, are you ready to dive into the magic of baking? For more tips on perfecting your crust, check out Flourish Baking. Enjoy your baking adventure!
Step-by-Step Preparation for Chicago-Style Bakery Apple Slices
Creating delicious Chicago-style bakery apple slices at home can be an incredibly rewarding experience. Not only are you replicating a beloved Midwest dessert, but you also have the opportunity to infuse it with your unique flair. Below, you’ll find an easy-to-follow guide that walks you through the preparation process step by step. Grab your apron, and let’s get started!
Preparing the Pie Dough
First things first, the pie dough is the foundation of your apple slices. A flaky, buttery crust will be the highlight of your treat.
- Ingredients: You’ll need all-purpose flour, unsalted butter, salt, sugar, and ice water.
- Mixing: In a large mixing bowl, combine 2 ½ cups of flour, 1 tablespoon of sugar, and 1 teaspoon of salt.
- Cutting in Butter: Cube 1 cup of cold butter and add it to the flour mixture. Use a pastry cutter or your fingertips to incorporate the butter until the mixture resembles coarse crumbs.
- Adding Water: Gradually add ice water, one tablespoon at a time, mixing until the dough just comes together. Be careful not to overwork it!
- Chilling: Shape the dough into a disk, wrap it in plastic wrap, and refrigerate for at least 30 minutes. This rest period is crucial for achieving that delightful flakiness.
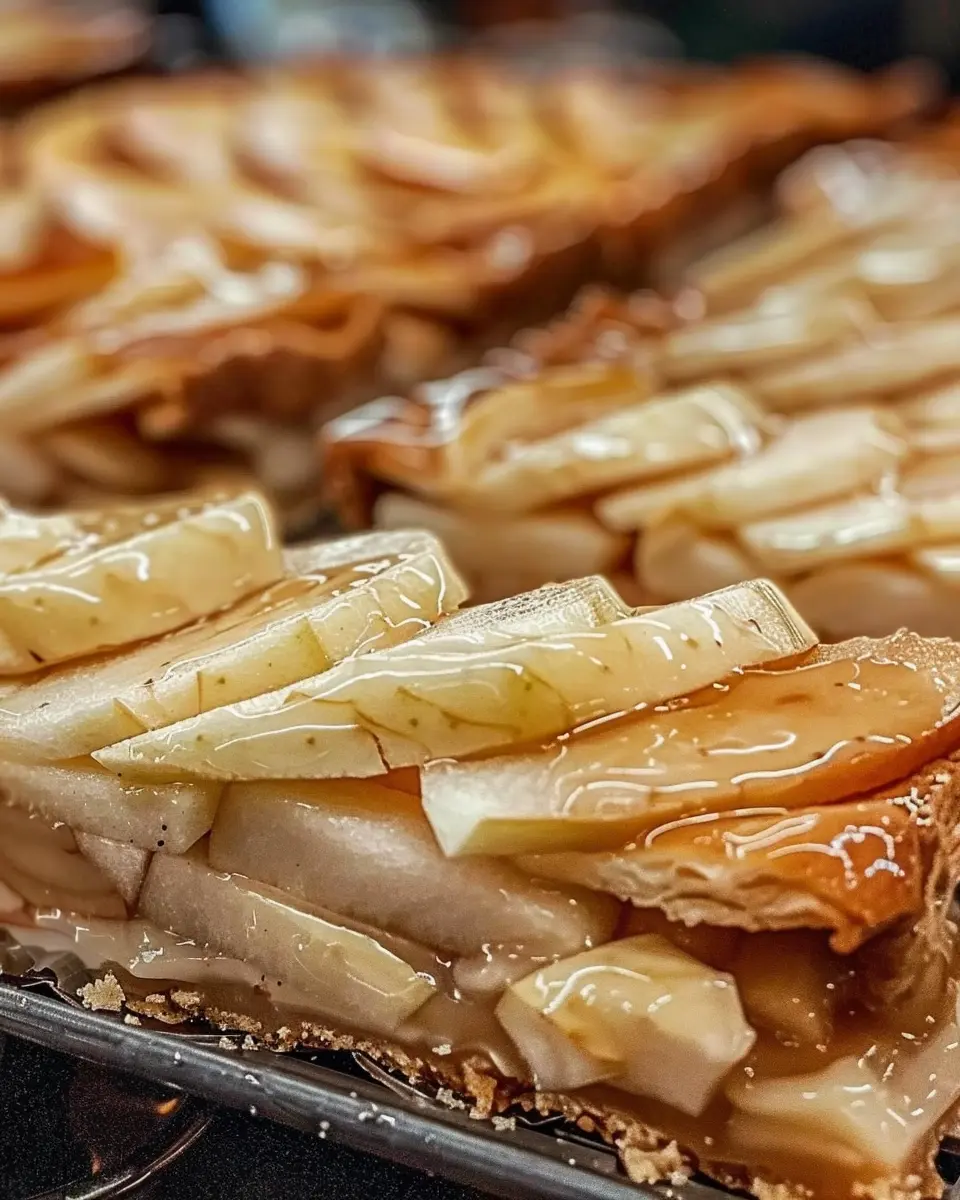
Assembling the Apple Filling
While the dough is chilling, it’s the perfect time to focus on the star of the show: the apple filling.
- Choosing Your Apples: Select a mix of sweet and tart apples for a more complex flavor. Granny Smith and Honeycrisp are excellent choices.
- Preparation: Peel, core, and slice about 6 cups of apples. You want them thin enough to bake evenly but thick enough to hold their shape.
- Flavoring: In a mixing bowl, toss the sliced apples with ¾ cup of sugar, 1 tablespoon of lemon juice, 1 teaspoon of cinnamon, and ¼ teaspoon of nutmeg. Allow this mixture to sit for about 10-15 minutes, allowing the juices to meld.
Rolling Out the Dough
Now, let’s bring your pie dough to life.
- Flouring the Surface: Lightly flour your countertop to prevent sticking.
- Rolling Technique: Divide your chilled dough into two halves. Roll out one half to fit your baking dish—about ⅛ inch thick. Don’t forget to frequently lift the dough and add flour underneath to keep it from sticking.
- Placing in Dish: Carefully transfer the rolled dough to your baking dish, ensuring it can hold the apple filling snugly.
Baking the Apple Slices
With the filling and crust prepped, it’s time for the most exciting part—baking!
- Filling: Spoon the apple mixture into the crust, making sure to distribute it evenly.
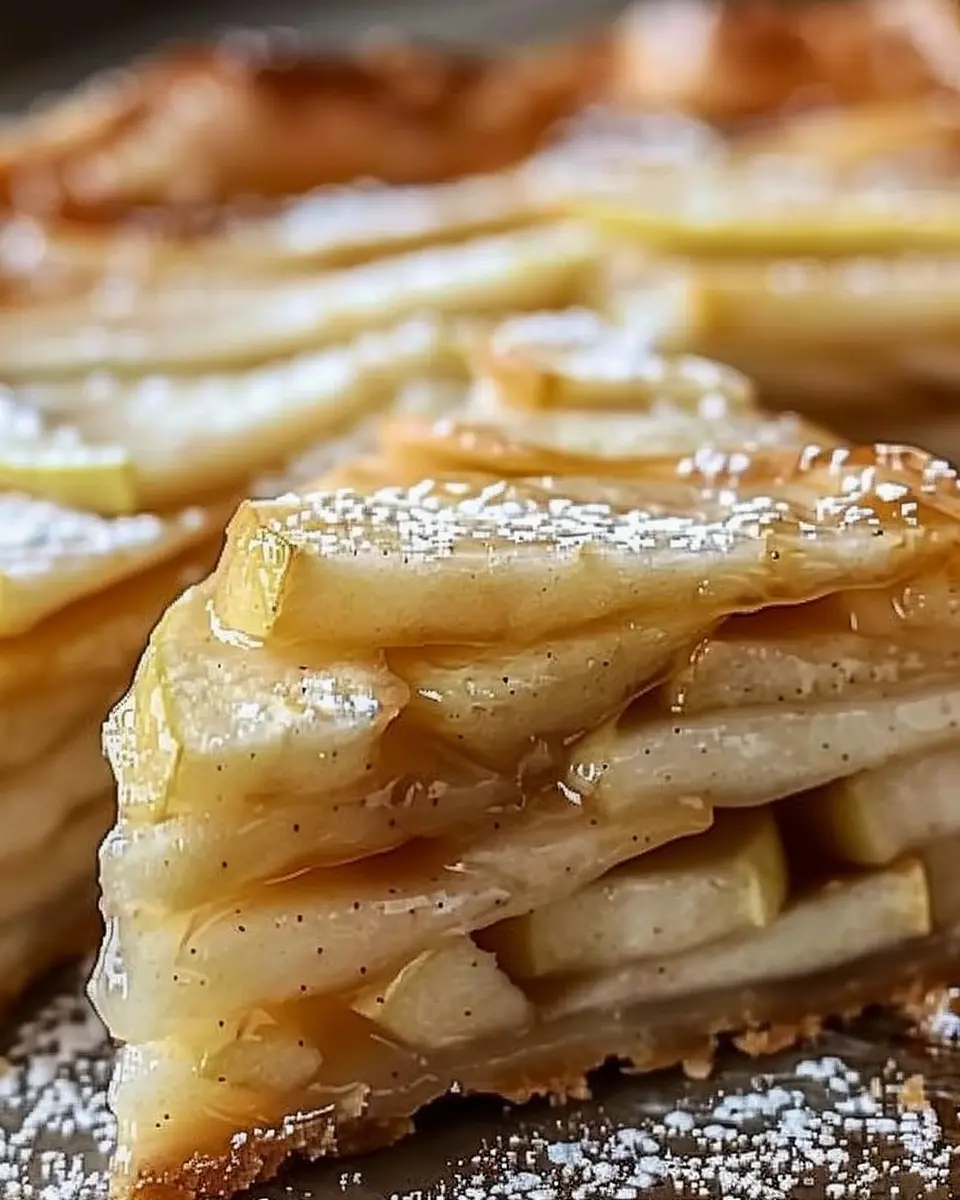
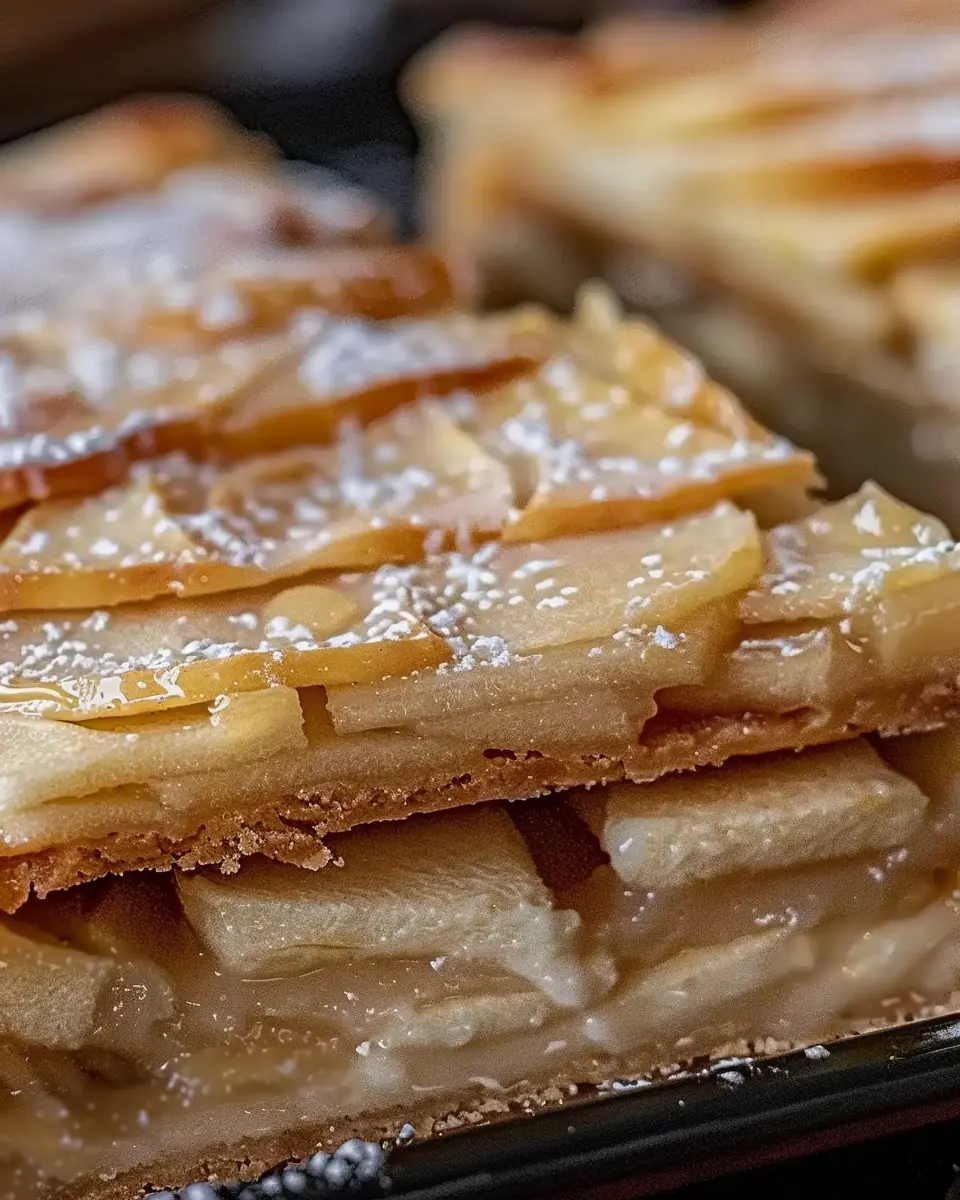
- Covering: Roll out the second half of the dough and lay it over the apple filling. Make a few small cuts in the top crust. This allows steam to escape and forms that classic bakery look.
- Baking Temperature: Preheat your oven to 375°F (190°C). Bake for 45-50 minutes until the crust is golden brown and the juices are bubbling.
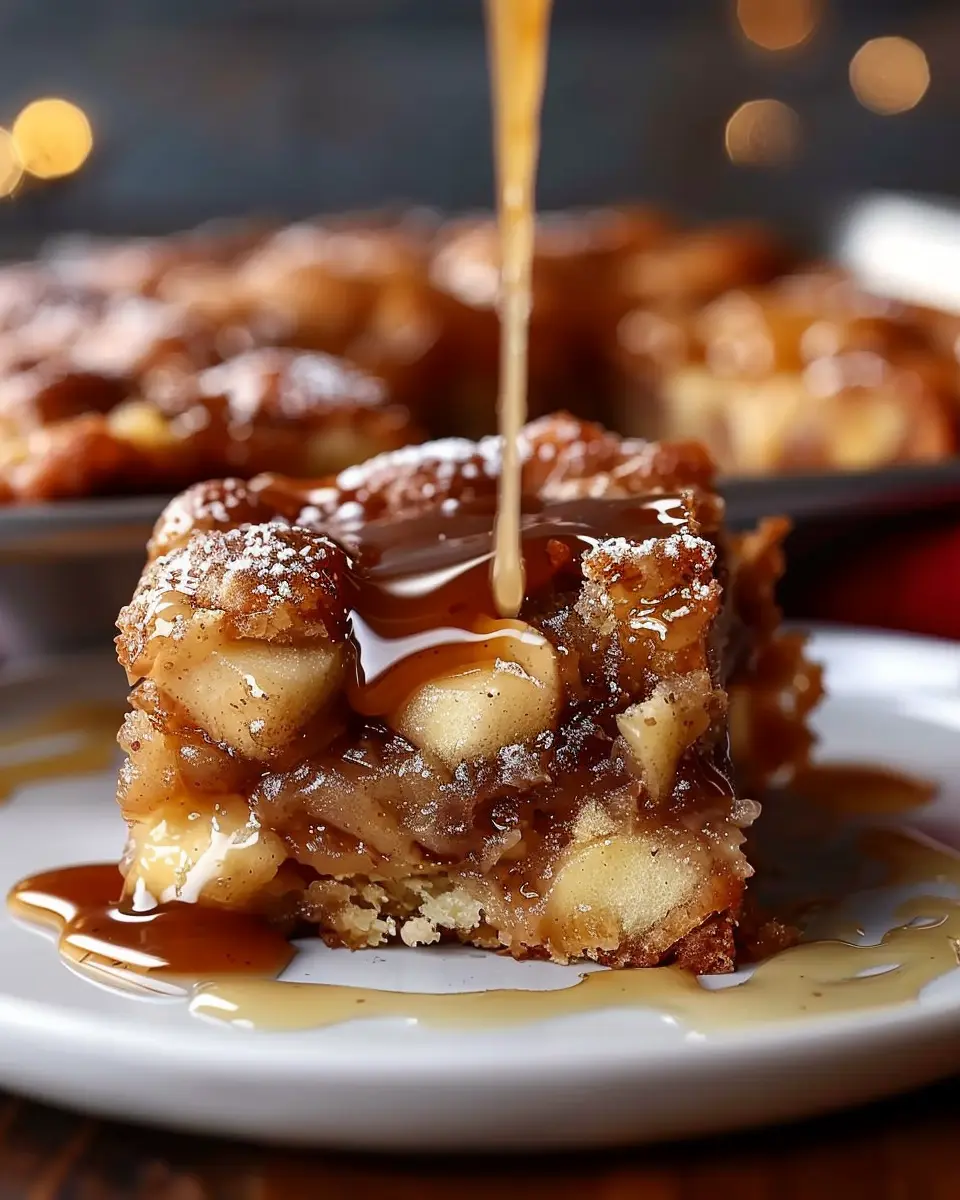
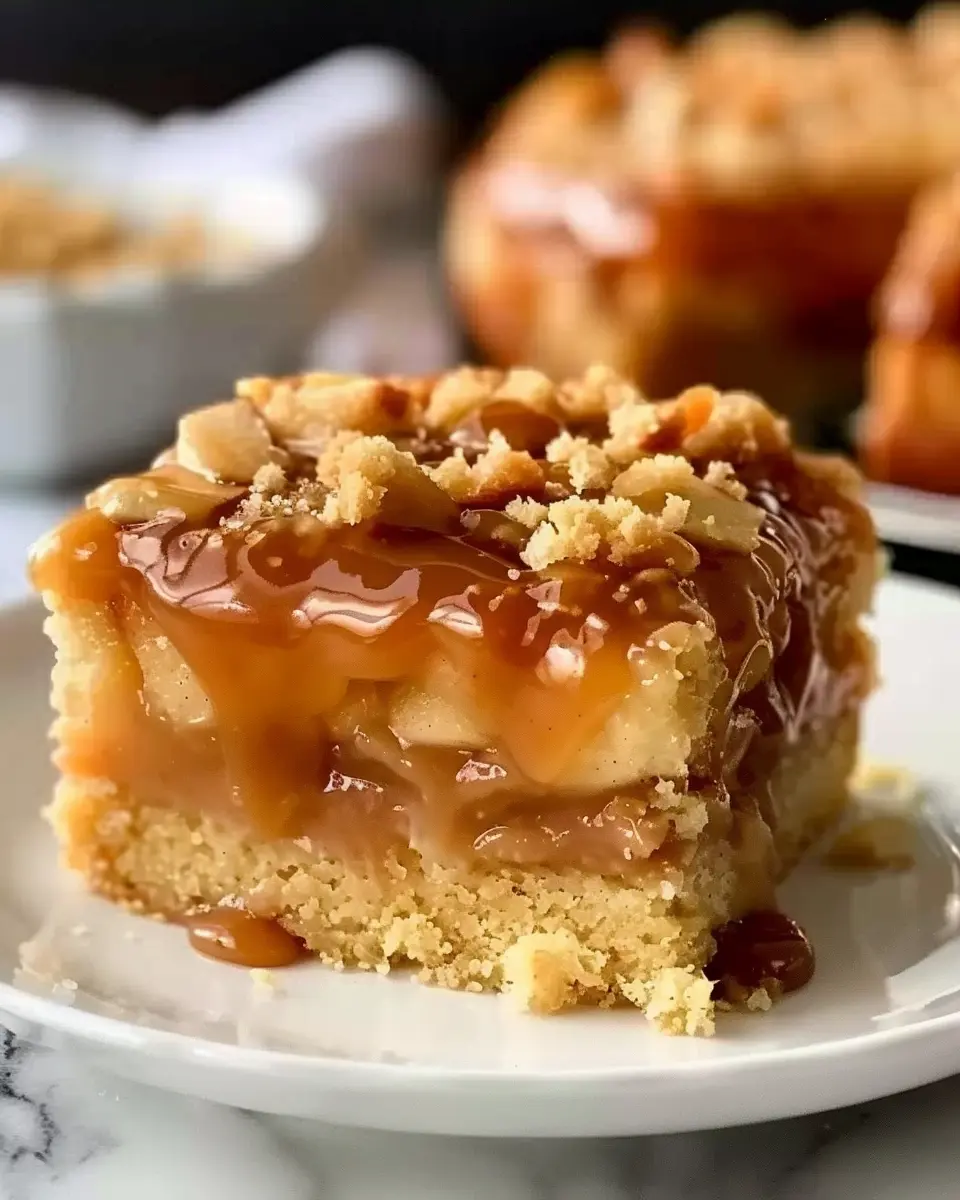
Making and Applying the Glaze
A shiny glaze can elevate your Chicago-style bakery apple slices from good to irresistible.
- Glaze Ingredients: Combine 1 cup of powdered sugar with 2 tablespoons of milk and 1 teaspoon of vanilla extract in a bowl. Stir until smooth.
- Application: Once the apple slices have cooled for about 15 minutes, drizzle the glaze over the top. This will add an inviting finish and a hint of sweetness.
Now that you’ve completed your Chicago-style bakery apple slices, sit back and enjoy a slice (or two). Nothing compares to the rustic charm of homemade desserts, and this recipe brings the spirit of the Midwest right to your kitchen. If you want to explore more delicious dessert ideas, check out links from The Kitchn or Serious Eats for inspiration. Happy baking!
Variations on Chicago-Style Bakery Apple Slices
When it comes to Chicago-style bakery apple slices, the traditional recipe is just the beginning. There are countless ways to make this delightful dessert even more exciting!
Adding Extra Spice to the Filling
Why not take your apple filling up a notch? Beyond the typical cinnamon, consider adding nutmeg or allspice for a warm, aromatic twist. A splash of vanilla extract can also deepen the flavor. Just imagine biting into a slice where every mouthful explodes with balanced spices — it’s pure bliss!
Fruit Filling Alternatives
Though apples are the star of this show, they don’t have to be the only fruit in the spotlight. Pears, for instance, can create a delightful blend when used alongside apples, offering a softer texture. If you’re in the mood for a summer experience, try some cherries or blueberries mixed in for a fruity burst. You could even go wild with a combo of peaches and apples for a refreshing twist! For more options, explore seasonal fruits that catch your fancy. Check out this article on seasonal fruit pairings for inspiration.
Crust Customizations
Let’s talk crust! While the classic flaky pastry is fantastic, you could experiment with a buttery shortbread or even a layer of crumb topping for a more rustic appeal. If you’re gluten-free, almond flour or a gluten-free blend can give you that satisfying crunch without the gluten. Don’t hesitate to get creative; after all, the beauty of Chicago-style bakery apple slices lies in their versatility!
By trying these variations, you can make a delicious treat that’s uniquely yours. So roll up your sleeves, and start experimenting!
Cooking Tips and Notes for Chicago-Style Bakery Apple Slices
Tips for the Flakiest Crust
Achieving that perfect, flaky crust in your Chicago-style bakery apple slices can elevate your dessert from good to unforgettable. Here are a few pro tips:
- Keep Ingredients Cold: Make sure your butter and water are really cold when mixing your dough. This helps create layers in your crust that will puff up beautifully when baked.
- Don’t Overwork the Dough: Mix just until everything is combined. Over-kneading can lead to a tough crust.
- Roll It Thin: Aim for a thin layer of dough, around 1/8 inch thick. This allows the slices to be light yet sturdy enough to hold the delicious apple filling.
Storage Tips for Freshness
After making your irresistible Chicago-style bakery apple slices, you might wonder how to keep them fresh. Follow these handy storage tips:
- Room Temperature: Store your apple slices in an airtight container at room temperature for 1-2 days for the best taste and texture.
- Refrigeration: If you have leftovers, they can last up to a week in the fridge. Just remember to reheat them slightly for that freshly baked feel!
- Freezing: For longer preservation, wrap individual slices in plastic wrap and place them in a freezer-safe bag. They can last up to three months. Just thaw in the fridge overnight when you’re ready to enjoy!
For more insights on apple selection and baking tips, check out Serious Eats and The Kitchn!
Serving Suggestions for Chicago-Style Bakery Apple Slices
Creative Plating Ideas
When serving your Chicago-style bakery apple slices, presentation can elevate this delightful dessert experience. Consider using a rustic wooden board or a vibrant colored plate to make those golden-brown apple slices pop. A dusting of powdered sugar offers a delicate touch, while a scoop of vanilla ice cream on the side adds a creamy contrast. For a sophisticated flair, drizzle some caramel sauce or chocolate syrup over the top. Remember, the visual appeal can enhance the deliciousness, so get creative!
Perfect Pairings with Other Desserts
These apple slices make a versatile companion for several desserts. How about serving them alongside a slice of rich cheesecake? The creamy, tangy flavor offers a delightful contrast to the sweet, spiced apples. Or complement them with a light panna cotta for a refreshing finish after a hearty meal. For an afternoon treat, pair the Chicago-style bakery apple slices with a steaming cup of chai or a robust cup of coffee. These combinations are sure to impress your guests and make for a delightful, memorable dessert spread.
Time Breakdown for Chicago-Style Bakery Apple Slices
Preparation Time
Making chicago-style bakery apple slices requires around 30 minutes for preparation. During this time, you’ll be peeling and slicing the apples, mixing the sugar and spices, and preparing the buttery dough. It’s a great opportunity to play some music or chat with friends while you enjoy the process!
Baking Time
Once your slices are in the oven, you’ll need about 35 to 40 minutes to bake them to golden perfection. This is when your kitchen will fill with an irresistible aroma—perfect for getting everyone excited about dessert!
Total Time
Overall, you’re looking at about 1 hour and 10 minutes from start to finish. In just over an hour, you can have a delightful Midwest classic ready to serve! For more tips and tricks on baking, check out King Arthur Baking for expert advice.
Enjoy every bite of your delicious chicago-style bakery apple slices!
Nutritional Facts for Chicago-Style Bakery Apple Slices
Caloric Breakdown
When indulging in Chicago-Style Bakery Apple Slices, it’s natural to wonder about the caloric content. Each slice typically packs around 250-300 calories, depending on the size and ingredients used. Considering the rich filling and buttery crust, it’s a treat to enjoy in moderation.
Key Nutrients
These delectable apple slices offer more than just sweetness:
- Carbohydrates: A slice features about 40-50 grams, providing a quick energy boost.
- Fiber: With around 2-3 grams, the apples contribute to your daily fiber intake, supporting digestive health.
- Vitamins: Each slice contains essential vitamins such as Vitamin C, which is crucial for immune function.
Ultimately, enjoying these Chicago-style bakery apple slices in moderation makes for a delightful dessert experience. Looking for more tips on incorporating fruits into your diet? Check out this resource for health benefits!
FAQs about Chicago-Style Bakery Apple Slices
Can I use frozen pie dough?
Absolutely! Using frozen pie dough can save you time while still delivering delicious results in your Chicago-style bakery apple slices. In fact, many bakers swear by it for the flaky texture it provides. Just make sure to thaw it completely before rolling it out. If you’re in a hurry, store-bought dough is a great shortcut, especially for those busy weeknights.
What’s the best way to reheat leftovers?
Reheating your Chicago-style bakery apple slices is easy and can revive their flavors beautifully. The best method is to preheat your oven to 350°F (175°C) and place the slices on a baking sheet. Heat them for about 10-15 minutes or until they’re warmed through. This method helps maintain that delightful crust while keeping the apples soft. If you’re looking for a quick fix, the microwave works too—just be sure to pop them in for short intervals to avoid sogginess.
How can I enhance the apple flavor?
To elevate the apple flavor in your Chicago-style bakery apple slices, consider adding spices like cinnamon or nutmeg to the apple filling. A splash of lemon juice not only brightens the taste but also keeps the apples from browning too quickly. You can also experiment with different apple varieties—Granny Smith for tartness or Honeycrisp for sweetness. For more in-depth tips on enhancing flavors in baking, you can explore resources from America’s Test Kitchen or Serious Eats that delve into ingredient pairings and flavor profiles.
By incorporating these tips, you’ll create delicious Chicago-style bakery apple slices that are bursting with flavor and a hit at any gathering!
Conclusion on Chicago-Style Bakery Apple Slices
Recap of the Recipe
To wrap things up, these Chicago-style bakery apple slices are a delightful tribute to classic Midwest desserts. With their flaky crust and sweet, spiced apple filling, they’re perfect for any occasion. You started with a simple dough, layered on those juicy apple slices, and finished with a sweet glaze. What a treat!
Encouragement to Experiment and Enjoy!
Don’t be afraid to make this recipe your own! Try adding different spices, swapping in other fruits, or even experimenting with gluten-free flour. The joy of baking is in the creativity! Share these delectable apple slices with friends, family, or at your next gathering. Enjoy the process and the delicious results! For more dessert inspiration, check out sites like King Arthur Baking or Taste of Home.
PrintChicago-Style Bakery Apple Slices: Best Classic Midwest Dessert
Chicago-Style Bakery Apple Slices are a delightful and classic Midwest dessert that showcases fresh apples wrapped in a flaky crust. Perfect for any occasion!
- Prep Time: 20 minutes
- Cook Time: 30 minutes
- Total Time: 50 minutes
- Yield: 8 servings 1x
- Category: Dessert
- Method: Baking
- Cuisine: American
- Diet: Vegetarian
Ingredients
- 3 medium apples
- 1 cup granulated sugar
- 2 cups all-purpose flour
- 1 teaspoon cinnamon
- 1/2 cup unsalted butter
- 1 egg
- 1/4 cup milk
- 1/2 teaspoon salt
- 1 teaspoon baking powder
Instructions
- Preheat the oven to 350°F (175°C).
- In a bowl, mix the flour, sugar, salt, and baking powder.
- Add the butter and mix until crumbly.
- In another bowl, mix the egg and milk, then combine with the dry ingredients.
- Roll out the dough and cut into squares.
- Peel and slice the apples, then sprinkle with cinnamon.
- Place sliced apples onto dough squares and fold over.
- Seal edges and place on a baking sheet.
- Bake for 30 minutes or until golden brown.
Notes
- Serve warm with ice cream for an added treat.
- Can be dusted with powdered sugar before serving.
Nutrition
- Serving Size: 1 slice
- Calories: 250
- Sugar: 15g
- Sodium: 120mg
- Fat: 10g
- Saturated Fat: 5g
- Unsaturated Fat: 4g
- Trans Fat: 0g
- Carbohydrates: 35g
- Fiber: 2g
- Protein: 3g
- Cholesterol: 20mg
Keywords: Chicago-Style, Bakery, Apple Slices, Dessert, Midwest