Introduction to Artisan Pizza Dough
When it comes to crafting that perfect pizza, the foundation—artisan pizza dough—is where it all begins. Whether you’re a seasoned chef or someone who just enjoys cooking at home, understanding the intricacies of making artisan pizza dough can elevate your pizza game to a whole new level.
What Makes Artisan Pizza Dough Special?
So, what sets artisan pizza dough apart from the usual pre-made options? For starters, it’s all about quality ingredients and the fermentation process. Traditional artisan methods often involve simplicity—flour, water, salt, and yeast. Yet, the magic occurs as the dough ferments. This long fermentation process not only develops rich flavors but also contributes to that coveted texture: crispy on the outside, chewy on the inside, and wonderfully bubbly.
-
High-Quality Flour: The choice of flour matters! For artisan pizza dough, many opt for 00 flour, known for its fine texture and ability to create a stretchy, pliable dough. You can find it at specialty grocery stores or online (King Arthur Baking is a great resource!).
-
Hydration Level: The amount of water in your dough heavily influences the final product. A higher hydration level (around 65-70%) creates that airy, open crumb structure that makes artisan pizza so delectable.
-
Natural Fermentation: Letting your dough rest and rise slowly allows beneficial bacteria to develop, promoting flavors and digestibility. This can take several hours or, for best results, overnight in the fridge. Why not test it out one weekend and impress your friends with your baking prowess?
Moreover, artisan pizza dough is incredibly versatile. You can experiment with different toppings—from turkey bacon and chicken ham to an array of fresh veggies—and each will turn out beautifully on this sturdy base.
In a world where fast food is easy, taking the time to craft your artisan pizza dough is a labor of love that pays off in delicious ways. So grab your ingredients, roll up your sleeves, and get ready to embrace your inner pizzaiolo! Your taste buds will thank you.
For tips on dough stretching techniques, check out Serious Eats, where they provide fantastic instructional videos and guides.

Ingredients for Artisan Pizza Dough
Essential Ingredients for a Perfect Crust
Creating artisan pizza dough begins with a handful of essential ingredients that combine to form that crave-worthy crispy, chewy crust. Here’s what you’ll need:
- Flour: Use high-protein bread flour for the best texture and structure.
- Water: Room temperature water hydrates the flour, encouraging gluten development.
- Yeast: Active dry or instant yeast gives your dough that magical rise.
- Salt: It enhances flavor and helps strengthen the dough.
- Olive Oil: A splash of quality olive oil adds richness and moisture.
These ingredients work in harmony to create a dough that sings with flavor and texture.
Optional Ingredients for Customization
Feel free to get creative with your artisan pizza dough! Here are a few optional ingredients that can elevate your dough:
- Honey or Sugar: Adds a hint of sweetness and encourages browning.
- Herbs: Dried oregano or basil can infuse subtle flavors right into the dough.
- Parmesan Cheese: Mixing in a bit of cheese can enhance both flavor and texture.
Experimenting with these additions can tailor your pizza to perfectly suit your palate. For more insights on customizing your pizza dough, check out this comprehensive guide on pizza-making techniques. Happy baking!
Preparing Artisan Pizza Dough
Creating the perfect artisan pizza dough is an art that anyone can master with a little bit of practice and patience. Whether you’re hosting a game night or a cozy date at home, a wonderful pizza can elevate the experience. Let’s break down the steps you need to success.
Mixing the Ingredients
To start, you’ll need a few simple ingredients: flour, water, salt, yeast, and a touch of olive oil. It’s essential to use high-quality ingredients, as they directly affect the flavor and texture of your dough. Measure the flour precisely, as too much can lead to a dry crust.
- Combine Dry Ingredients: In a large mixing bowl, combine about 4 cups of all-purpose flour, 1.5 teaspoons of salt, and 2.5 teaspoons of yeast.
- Add Water and Olive Oil: Slowly add about 1.5 cups of lukewarm water (between 100°F and 110°F is ideal) and 2 tablespoons of olive oil. This temperature range activates the yeast nicely, ensuring a good rise.
Using a wooden spoon or your hands, mix until the ingredients are just combined. Don’t overmix at this stage; it’s okay if the dough looks shaggy and a bit sticky.
The Importance of Resting the Dough
After mixing, let the dough rest for about 30 minutes. This is a crucial step often overlooked by novice bakers. Resting allows the flour to absorb the water fully and helps begin the gluten development process. It’s a great time to clean up your workspace or prepare toppings for your pizza.
This passive time contributes significantly to the texture of your artisan pizza dough, leading to that coveted crispy, chewy crust. While you wait, consider reading more about dough fermentation on King Arthur Baking.
Developing Gluten Through Folding
Once your dough has had its initial rest, it’s time to develop the gluten. Instead of kneading, which can be strenuous, use the folding technique. Here’s how:
- First Fold: Lightly flour your work surface and transfer the dough. Using your hands, gently stretch and fold the dough. Start by pulling the dough from one side toward the center and pressing it down. Rotate the dough a quarter-turn and repeat.
- Repeat: Do this folding technique every 30 minutes for a couple of hours. This will help develop a nice structure without straining your arms.
By the end of this process, your dough should feel elastic and smooth. The gluten network makes all the difference, giving your crust the perfect texture.
Shaping the Dough Balls
Now comes the fun part—shaping your dough into balls!
- Divide the Dough: Use a dough scraper to divide the dough into 4 equal portions. Each portion should weigh about 8 ounces.
- Shape the Balls: Take each piece and tuck the edges underneath, creating a tight ball. This helps in creating surface tension, which is essential for a nice rise.
Place each dough ball on a floured surface and cover them with a clean kitchen towel or plastic wrap. Allow them to rest for another hour.
The Final Rise Before Baking
Before you bake, don’t skip this last crucial rise.
- Let the Dough Rest Again: After shaping, the dough needs one final rise, lasting about 1 to 2 hours. This helps the yeast work its magic, creating those delightful bubbles in the crust.
During this time, preheat your oven to a high temperature (at least 475°F). If you have a pizza stone, place it in the oven to heat up. This will help achieve a crust that is both crispy and bubbly.
Crafting your own artisan pizza dough becomes a rewarding experience. Soon enough, you’ll be creating delicious pizzas that could rival those from your favorite pizzeria! Happy baking, and enjoy your homemade culinary masterpiece.
Variations on Artisan Pizza Dough
Creating the perfect artisan pizza dough is an art, but that doesn’t mean you can’t get creative! Whether you’re looking for a healthier option, a burst of flavor, or a gluten-free alternative, there’s a variation for everyone.
Whole Wheat Artisan Pizza Dough
For those wanting to incorporate more whole grains into their meals, whole wheat artisan pizza dough is an excellent choice. The nuttiness of whole wheat flour adds a distinct flavor and a hearty texture to your crust. Here’s a simple way to make it:
- Substitute 50% of the all-purpose flour with whole wheat flour.
- Add a bit more water than you would with regular dough, as the whole wheat absorbs moisture differently.
This dough not only provides nutritional benefits but also adds a delightful chewiness to your pizza.
Herb-Infused Artisan Pizza Dough
Want to elevate your pizza experience? Try infusing your artisan pizza dough with fresh herbs! Adding finely chopped basil, oregano, or rosemary transforms your crust into a flavor-packed delight.
- Just mix about two tablespoons of finely chopped herbs into your dry ingredients.
- For an extra kick, consider adding garlic powder or red pepper flakes.
This variation brings a fresh taste that pairs beautifully with a wide variety of toppings.
Gluten-Free Artisan Pizza Dough Options
If you’re navigating gluten sensitivities, fear not! There are fantastic gluten-free options for artisan pizza dough. You can use a gluten-free all-purpose flour blend, which typically includes a mix of rice flour, potato starch, and tapioca flour.
- Combine with xanthan gum to help replicate the elasticity found in traditional dough.
- Some recipes even benefit from almond flour or chickpea flour for added taste and texture.
For those looking for resources, check out the Gluten-Free Girl for expert insights on gluten-free baking.
With these variations, your pizza nights can be as unique as your taste! Experiment, enjoy, and don’t forget to share your tasty creations with friends!
Cooking tips for Artisan Pizza Dough
Ensuring maximum crispiness
To achieve that crispy artisan pizza dough you crave, start by preheating your oven to the highest temperature—ideally around 500°F (260°C). A hot oven is crucial for a crunchy base. Consider using a pizza stone or baking steel; they retain and radiate heat efficiently. If you don’t have either, an inverted baking sheet can work too!
Perfecting dough handling techniques
When working with your artisan pizza dough, handle it gently to preserve those air bubbles that contribute to a chewy texture. Avoid excessive kneading after the first rise; a gentle stretching method is ideal. Also, letting the dough rest at room temperature for at least 30 minutes before shaping allows for easier manipulation. And remember, flour your surface adequately to prevent sticking!
Recommended tools for best results
Investing in the right tools can elevate your pizza-making game. A pizza peel is indispensable for transferring your masterpiece to the oven. A dough scraper will help you manage your artisan pizza dough effectively. If you’re serious about crust perfection, look into a kitchen scale for precise measurements, as even slight variations can impact your results.
For more insights on pizza-making techniques, check out Serious Eats for an array of expert tips!
Serving suggestions for Artisan Pizza Dough
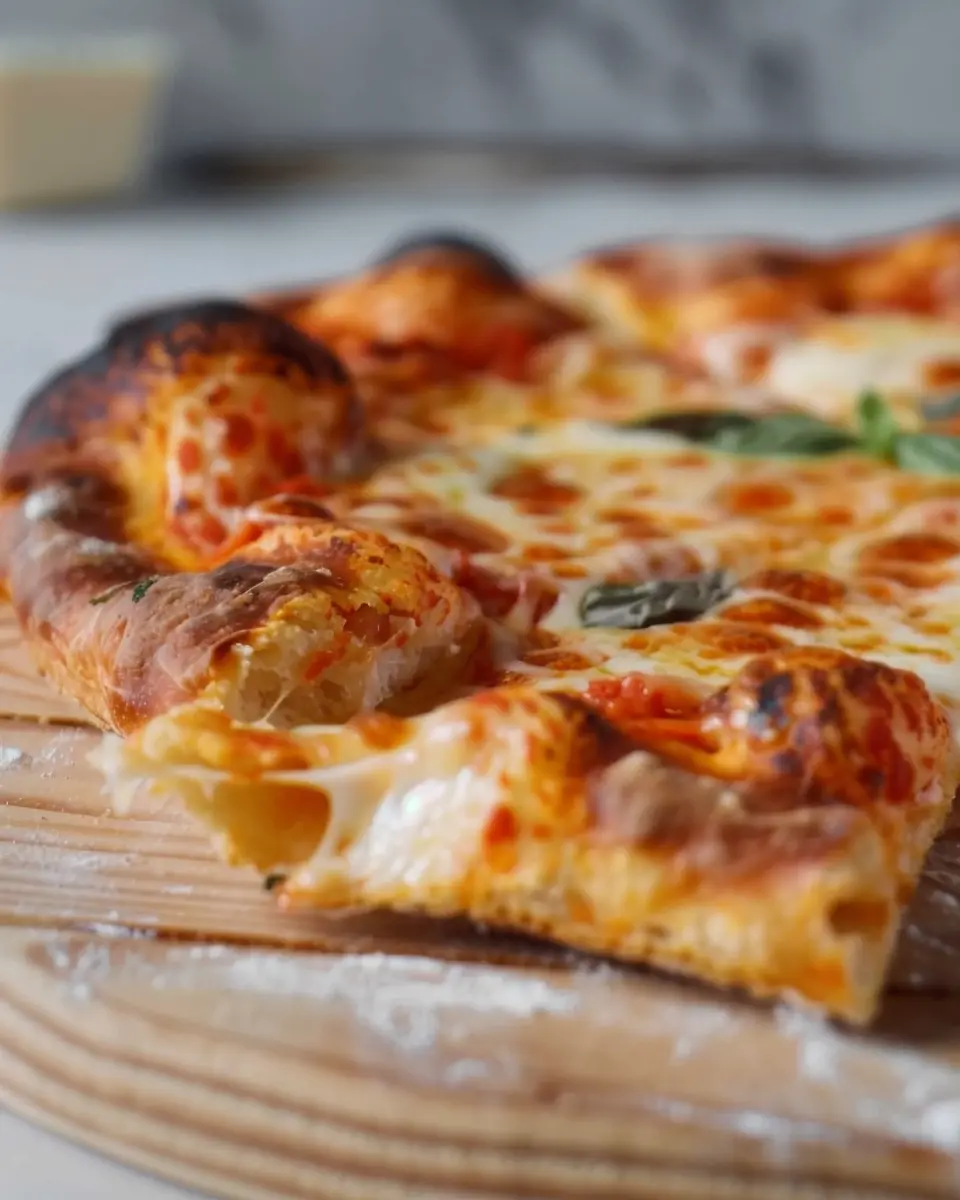
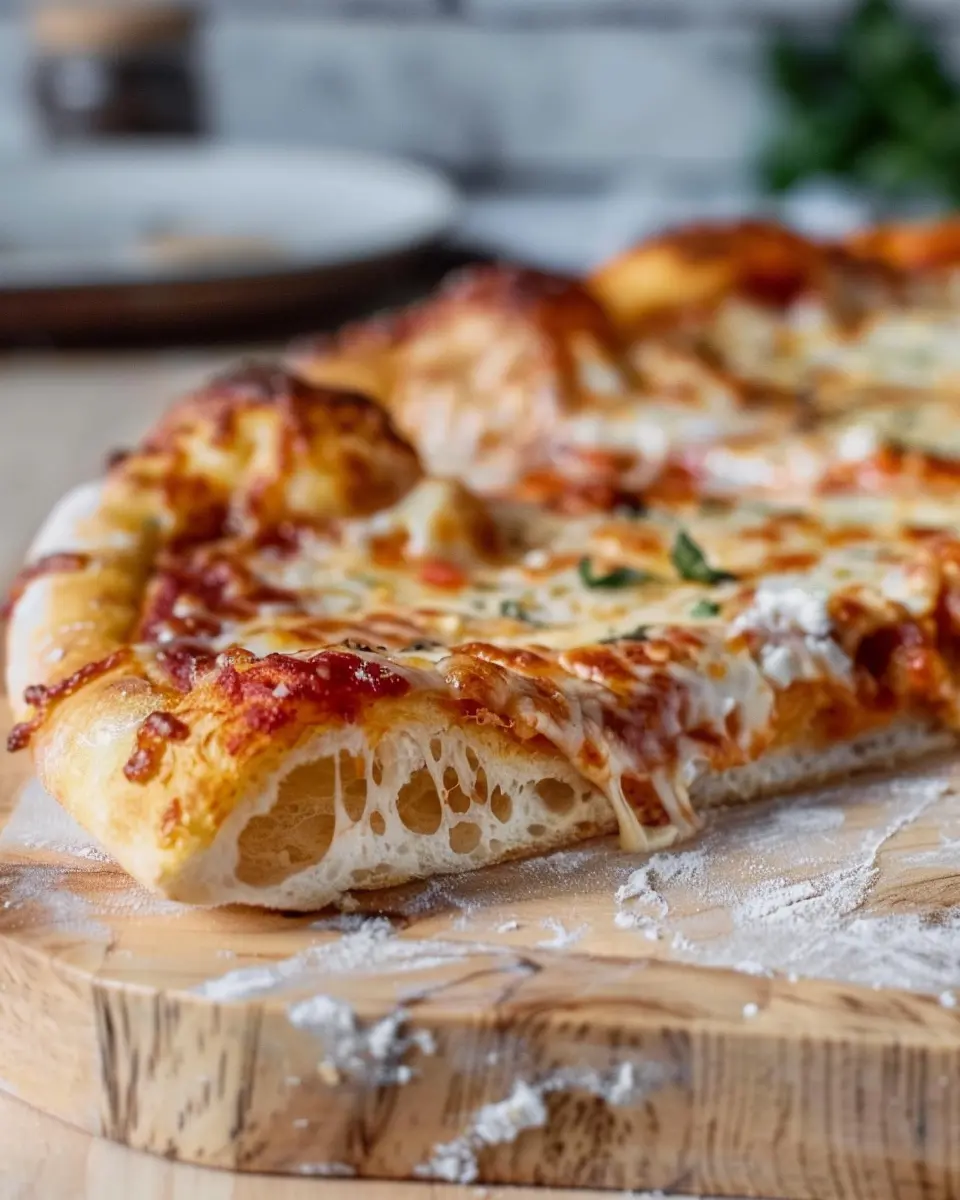
Classic Margherita Pizza
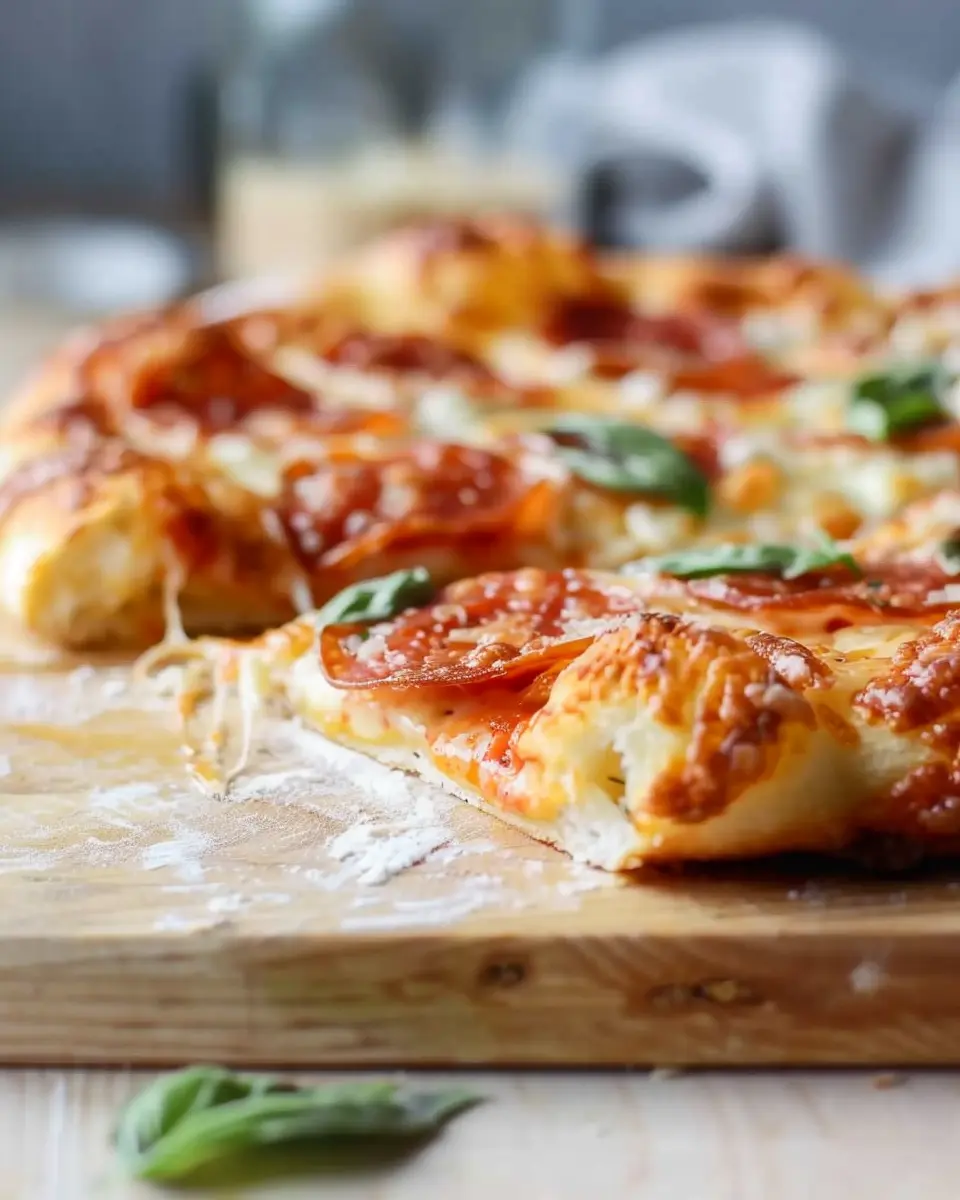
Nothing beats the simplicity of a classic Margherita pizza when using artisan pizza dough. For this beloved dish, top your dough with a generous layer of crushed San Marzano tomatoes, fresh mozzarella, and a sprinkle of sea salt. Don’t forget the fresh basil leaves added after baking to give that aromatic finish. Drizzle with good-quality olive oil for extra flavor.
Gourmet Toppings for Adventurous Eaters
If you’re looking to take your pizza night to the next level, explore gourmet toppings that can transform your artisan pizza dough into a culinary masterpiece. Consider:
- Roasted Garlic and Spinach: Spread a garlic-infused olive oil, top it with sautéed spinach, and add a sprinkle of feta or goat cheese.
- Turkey Bacon and Avocado: For a twist on a classic, add crispy turkey bacon, sliced avocado, and a drizzle of lime crema after baking.
- Beef and Caramelized Onion: Sauté thin slices of seasoned beef with onions until caramelized and spoon over your baked pizza.
Experiment with combinations and create your unique masterpiece! For more inspiration, check out Serious Eats and Food & Wine for creative topping ideas.
Time details for Artisan Pizza Dough
Understanding the time commitment for making artisan pizza dough is crucial for planning your pizza night. Here’s a quick breakdown:
Preparation time
It will only take you about 10-15 minutes to mix and knead your dough. That’s just a quick hands-on session to set the stage for your delicious pizza!
Rising time
After mixing, the dough needs some love during the first rise, which can take about 1-2 hours in a warm place. This is when the magic happens — your dough will expand and develop great texture.
Baking time
Once shaped and topped, your pizza will need approximately 10-15 minutes in a preheated oven. Keep an eye on it; you want that perfectly golden crust!
Total time
From start to finish, including prep, rise, and bake, expect to spend about 1.5 to 3 hours. But remember, most of that time is just letting the dough do its thing, making it a low-effort yet rewarding process.
For more tips on dough rising techniques, check out this insightful article on dough handling, and enjoy the process!
Nutritional Information for Artisan Pizza Dough
When it comes to artisan pizza dough, understanding its nutritional value can help you make informed choices for your meals. Let’s break it down:
Calories Per Serving
One serving of artisan pizza dough typically contains around 250-300 calories. This makes it a hearty base for your favorite toppings without overpowering your meal.
Carbohydrates and Protein Content
In terms of macronutrients, you’ll find approximately 50-60 grams of carbohydrates per serving, providing a good energy source. Additionally, it contains about 7-10 grams of protein, helping you feel fuller for longer.
Sodium Levels
When it comes to sodium, artisan pizza dough usually has about 400-600 mg per serving. This is something to keep in mind, especially if you’re watching your salt intake. Consider pairing it with fresh ingredients to boost flavor naturally!
By making your dough from scratch, not only do you control the ingredients, but you can also adapt recipes to meet your dietary needs. Looking for ways to enhance your dough’s flavor without the added sodium? Consider using herbs and spices—your taste buds will thank you!
For more information, check out Healthline or NutritionData for a more detailed look at ingredients and their nutritional profiles.
FAQs about Artisan Pizza Dough
How do I know if my dough has risen enough?
Determining if your artisan pizza dough has risen sufficiently is a critical step in achieving that perfect crust. Generally, you’ll want to aim for at least double its original size during the first rise. An excellent method to check is the “poke test”: gently poke the dough with your finger. If the indentation springs back slowly, it’s ready to go. If it fills in quickly, give it a little more time. Remember, patience is key!
Can I freeze artisan pizza dough?
Absolutely! Freezing artisan pizza dough is a game-changer for meal prep. After your dough has risen, shape it into balls and store them in freezer-safe bags. Be sure to remove excess air and label them with the date. When you’re ready to use your dough, transfer it to the refrigerator the night before to thaw slowly. This gives you that desirable texture and flavor when you’re ready to create your pizza masterpiece.
What toppings pair well with artisan pizza dough?
The beauty of artisan pizza dough lies in its versatility, making it a fantastic base for various toppings. Here are some popular combinations to inspire your next pizza night:
- Classic Margherita: Fresh mozzarella, tomatoes, basil, and a drizzle of olive oil.
- Mediterranean Delight: Feta cheese, kalamata olives, artichokes, and arugula.
- BBQ Chicken: Grilled chicken ham, red onions, and BBQ sauce for a smoky twist.
- Turkey Bacon and Veggies: Turkey bacon, bell peppers, and a sprinkle of cheese.
With endless options, you can mix and match until your heart’s content—get creative! For additional topping ideas, check out resources like Serious Eats or The Kitchn. Enjoy crafting your perfect artisan pizza experience!
Conclusion on Artisan Pizza Dough
Creating your own artisan pizza dough elevates your culinary experience to a new level. Not only does it allow for customization—think fresh toppings and unique flavor combinations—but it also delivers that crispy, chewy, bubbly crust we all crave. When you make pizza at home, you control the quality of ingredients, ensuring each bite is delicious and satisfying.
The joy of sharing homemade pizza with friends or family fosters connection and creativity. So, next time you’re in the kitchen, why not roll up your sleeves and craft your own artisan pizza dough? It’s a rewarding journey that’s sure to impress and delight!
For more tips and tricks on perfecting your homemade pizza, check out this comprehensive guide, which covers everything you need to know about dough fermentation and cook techniques!
PrintArtisan pizza dough: master a crispy, chewy, bubbly crust at home

Learn how to make artisan pizza dough that results in a perfectly crispy, chewy, and bubbly crust from the comfort of your home.
- Prep Time: 15 minutes
- Cook Time: 15 minutes
- Total Time: 2 hours 30 minutes
- Yield: 2 large pizzas 1x
- Category: Pizza
- Method: Baking
- Cuisine: Italian
- Diet: Vegetarian
Ingredients
- 4 cups all-purpose flour
- 1 1/2 teaspoons salt
- 1 teaspoon sugar
- 2 teaspoons active dry yeast
- 1 1/2 cups warm water
- 2 tablespoons olive oil
Instructions
- Combine warm water, sugar, and yeast in a bowl and let it sit until frothy, about 5 minutes.
- In a large mixing bowl, combine flour and salt. Make a well in the center.
- Pour the yeast mixture and olive oil into the well. Mix until a dough forms.
- Knead the dough on a floured surface for about 10 minutes until smooth and elastic.
- Place the dough in a greased bowl, cover, and let it rise in a warm place until doubled in size, about 1-2 hours.
- Punch down the dough, divide into portions, and shape as desired.
- Let the shaped dough sit for another 30 minutes before stretching and topping for pizza.
Notes
- For best results, use a pizza stone to cook your pizza.
- Experiment with different flours for various textures.
Nutrition
- Serving Size: 1 slice
- Calories: 250
- Sugar: 1g
- Sodium: 400mg
- Fat: 5g
- Saturated Fat: 1g
- Unsaturated Fat: 3g
- Trans Fat: 0g
- Carbohydrates: 45g
- Fiber: 2g
- Protein: 8g
- Cholesterol: 0mg
Keywords: artisan pizza dough, crispy pizza crust, chewy pizza, bubbly pizza crust